Showing posts with label Buttons Galore and More. Show all posts

Friday, June 14, 2013

Patriotic America the Beautiful Primitive Doll - Laura Kelly's America the Beautiful Fabric

Welcome to I LOVE THE USA Blog Hop sponsored and put together by the lovely and talented Laura Kelly and Jen Goode. I hope you all enjoy my Patriotic America the Beautiful Doll using Laura Kelly's Fabric - America the Beautiful.


For my I Love the USA Blog Hop, I created a Patriotic America the Beautiful Statue of Liberty Primitive Doll.  I am not a seamstress, and I can great when it comes to using a sewing machine on paper, and not to bad in making things that don't require the perfect stitch.  So, that is way I created a Patriotic America the Beautiful  Statue of Liberty Primitive Doll using Laura Kelly's America the Beautiful Fabric.

The project was really a fun project to create, and if you can sew basic stitches you can create one similar.  Now, I must tell you that as I was shopping at our local Joann Fabric Store, I came across more of Laura Kelly's FABULOUS Fabric and I couldn't walkout without getting several yards of them.  So, be sure to check out what I create with those fabulous finds.

So, here she goes:


I made the doll using muslin and coffee dying it to age all the fabric.  I then sewed the Laura Kelly's America the Beautiful fabric to create a skirt for my doll.  I added some of her Buttons Galore & More line of buttons Laura Kelly's Mixed Buttons to adorn her skirt.

The twig around her head I actually picked up at Joann's and thought it would make the perfect crown for her.  I colored in her eyes and sewed in her nose.  I found a fabric quarter while shopping at Joann's for her shirt and pockets, which I also aged in coffee.

I love ragged dolls and this one was by far the cutest little thing I have made thanks to Laura Kelly's America the Beautiful fabric.

While I was on the inspirational note, I also created a lovely wall hanging canvas decor for Buttons Galore and More using Laura's  fabric, so be sure to visit Buttons Galore & More blog to see what else you can create with the extra pieces that  you have left over.

Well, I hope you enjoyed my project for today.  Be sure to visit the other talented ladies participating on the hop and leave comments.
*

Tuesday, April 30, 2013

April Showers Brings Flutterbug Plaque


April
April is a very special month for me.  It was the month in which I first became a mother.  I have two beautiful daughters both born in April and they are certainly April Showers, full of lots of love and joy.  They are each distinctly different, but loving in many ways.  
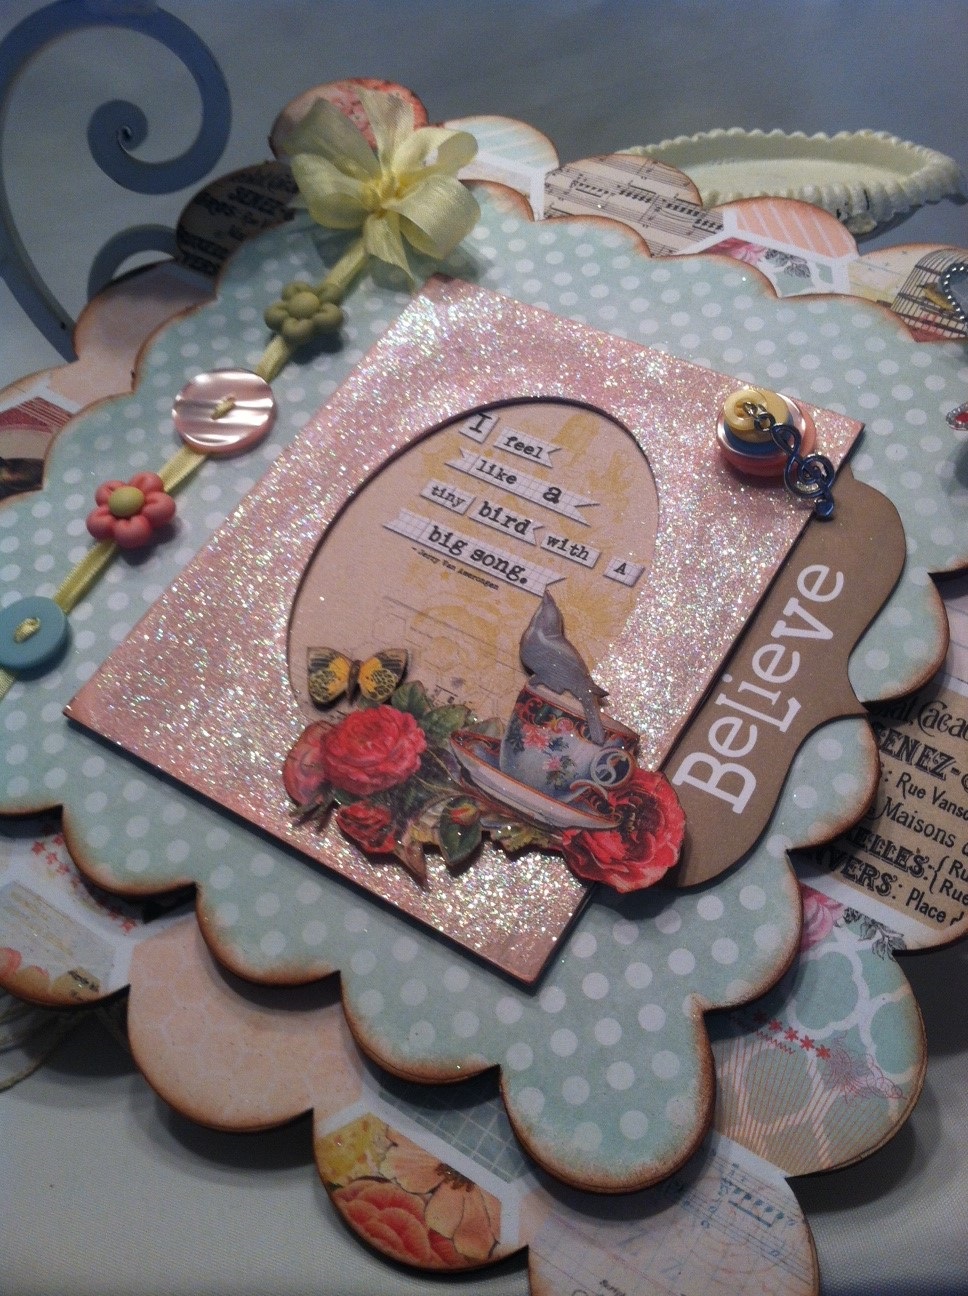
I created this Flutterbug Plaque for my Karla "K" who turned 17 this April and I wanted her to know that she can always do whatever she sets her heart to do as long as she "BELIEVES"!!!!!
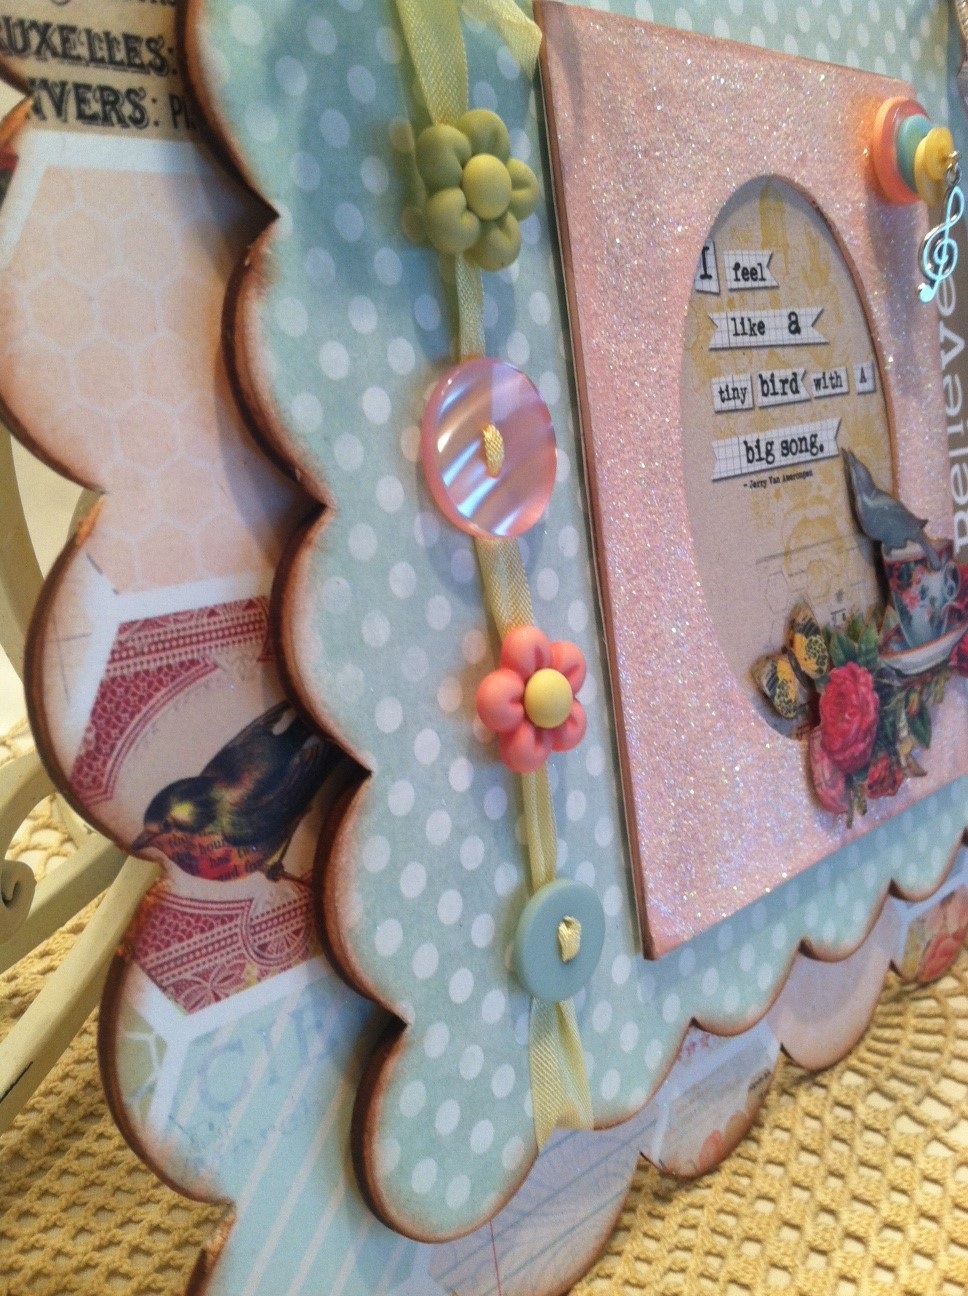
So, as you can see there are so many April Shower surprises for me.  I made my plaque using various supplies and the wood plaques are from ADORNit!
My Springtime Flutterbug Medley Wall plaque is cute for any young lady and very easy to make!
april2
April4

Material used:

Buttons Galore & More Products used:

Directions:

Once  you have gathered all your supplies, you can begin to transform the scalloped frames into something totally cute and ready for Spring.
April instructional material
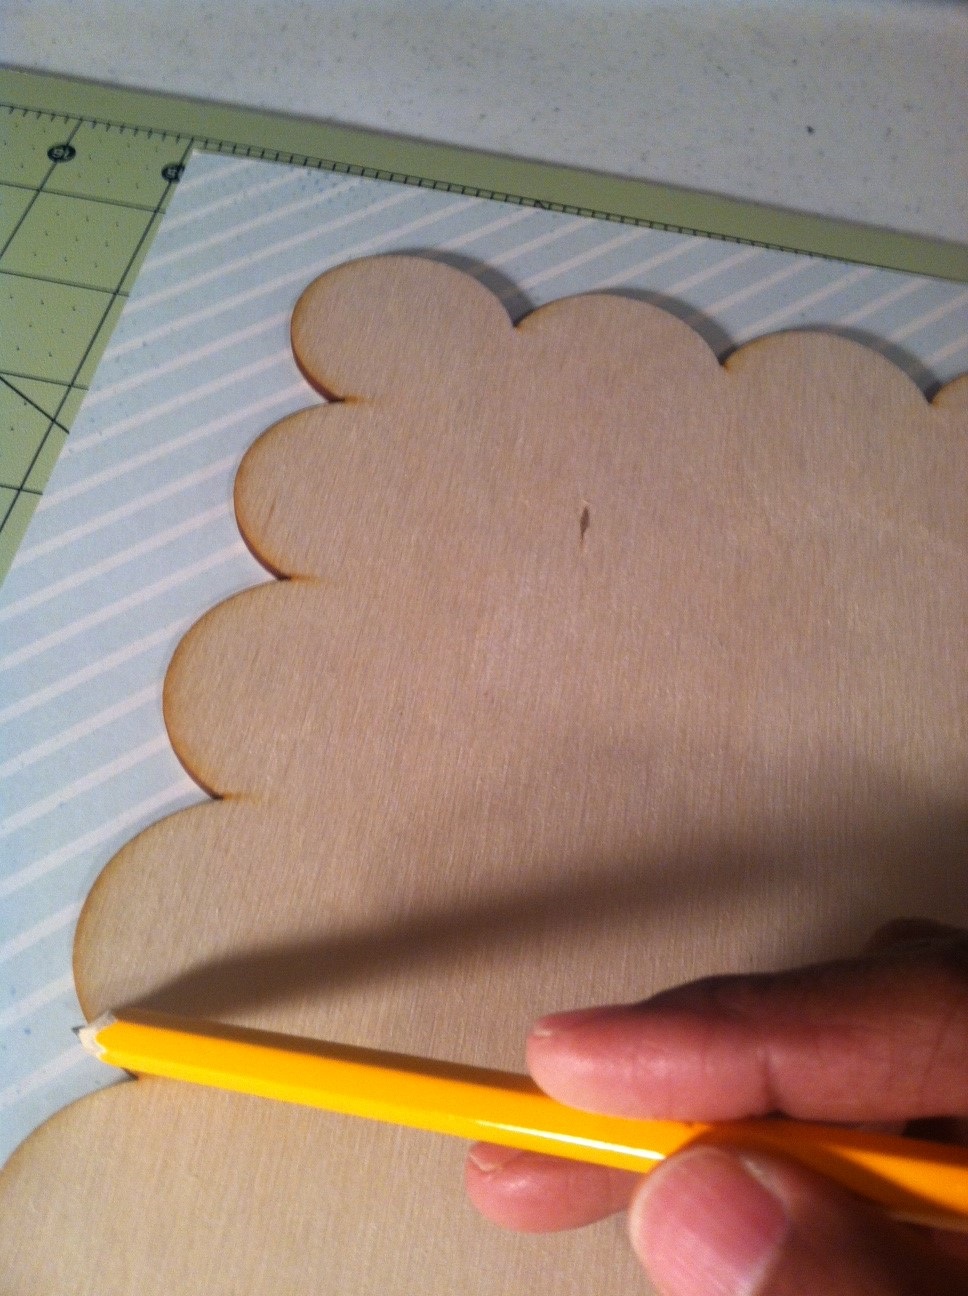
STEP ONE:
Start by tracing the large scalloped wood frame into you paper of choice.    Be sure to trace on  the back side of the paper.
instructional material3
Once you have both frames the large and the small scalloped frames traced like you see above you can begin to cut.
STEP TWO:
Cut the frames that you just traced and you can use an Xacto knife for the harder to cut places or your Friskar Scissors.
Instructional Material 4
STEP THREE:
Apply Beacon 3 – in -1 adhesive or Zip Dry they both work just as good to your decorative paper and adhere to the scalloped frames.  A good tip is to use a sanding block to sand off the edges of the paper that may hang from the edges.  This also gives it a more distressed look!  Once you have distressed with the sand block use a Distressing Ink like Tim Holt’s to distress the edges of the frames/paper.
STEP FOUR:
Distress the Edges once they are all adhered to the wood frame.
STEP FIVE:
My favorite part is decorating.  These are 3D frames from Want2Scrap and I painted and applied glitter and glue.  I also used Buttons Galore and More Flutterbug Medley Buttons to accent the plaque and threaded a piece of seam binding to the buttons.
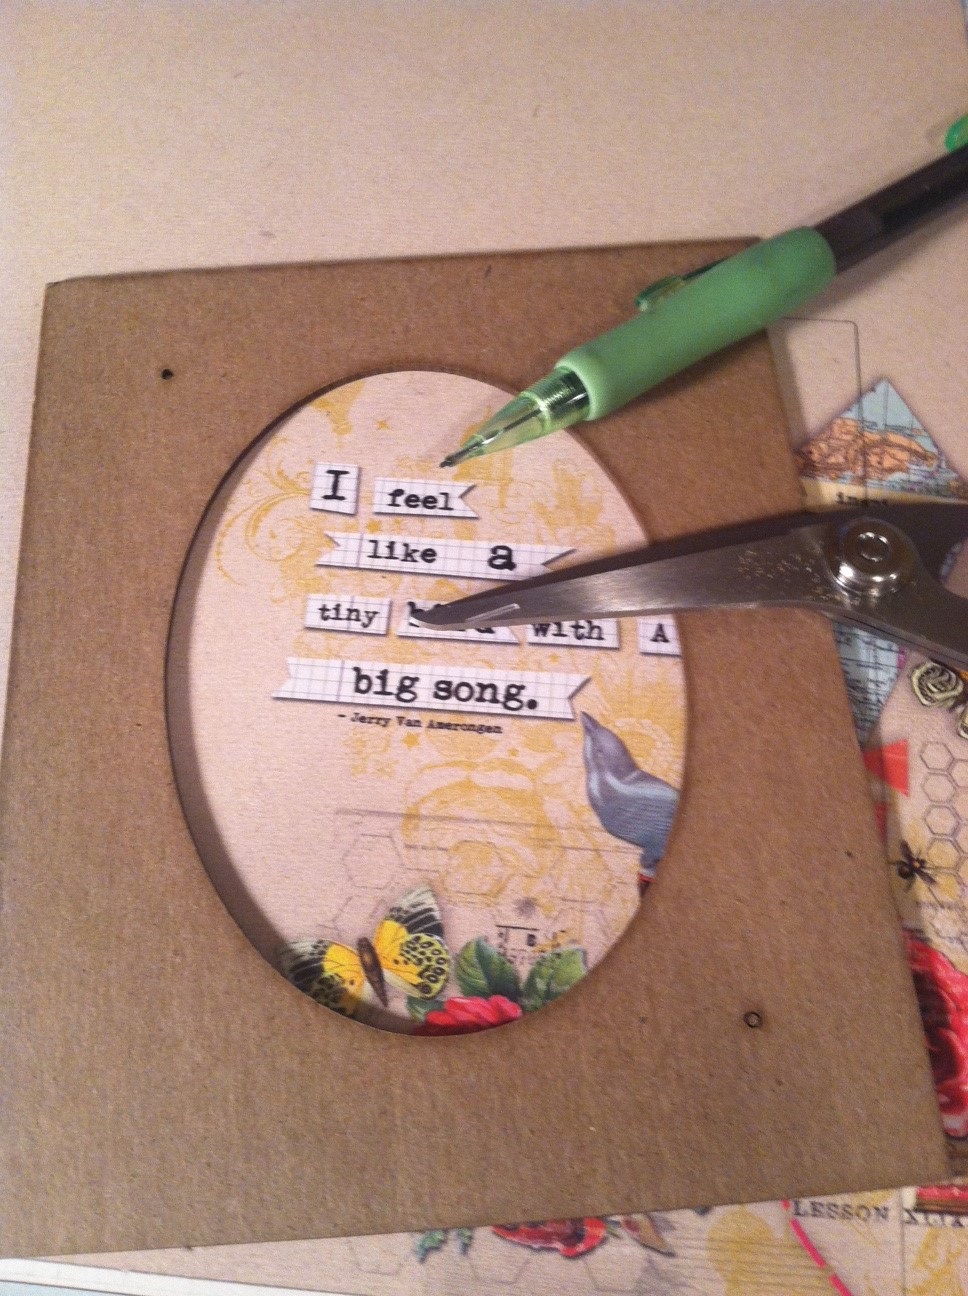
Instructional material 5
I used my Fiskar scissors to cut out another piece similar to the one above to give it the dimensional look.
Finally, to top finish this project I added a few of my favorite things, which are buttons, bling, and seam binding.  I gathered a few buttons that I had laying around added that along with Want2Scrap Musical Chef charm.

Thursday, April 25, 2013

Totally Shabby Rose Garden Birdhouse

As a Design Team member of Buttons Galore & More, we were given a Buttons & Birdhouses Designer Challenge.  Now, it wasn't your ordinary birdhouse like the kind that looks like a typical house, instead it was a bit of a challenge.  The idea is that we would all design this house with Buttons Galore & More buttons with a twist of what we would like to see in a birdhouse.

This Buttons & Birdhouses Designer Challenge runs from April 26 - 28th and I will be linking in with Buttons Galore & More website.  If you are a follower of Buttons Galore & More I strongly encourage you to vote for your favorite birdhouse.  One random commenter on the Buttons Galore & More's blog will be win a $10 Starbucks Gift Card and a pair of Fiskars Scissors!!!  Make sure you are following Buttons Galore & More on Facebook and Twitter.

So, let me get back to that birdhouse.  I enjoy a challenge and this project was just that, because I didn't start off with a typical style birdhouse, let's just say that I started out with a birdhouse that was rounded almost like a cylinder.  My first impression was oh this will be fun, but as I started to work with the birdhouse, I ran into the problem that it was not straight it was rounded or cylinder shape.  Anyway, I took on the challenge with a shabby approach and let's just say that I made a Totally Shabby Rose Garden Birdhouse, using the Rose Garden buttons from Buttons Galore & More!

Here is what I started out with and yes, I was quite clueless at first, because I wasn't sure if I was going to paint or what I wanted to create!
NOW do you see what I mean this shape was not easy to work with and it is about 5 1/5" tall and maybe 2 3/4"  round.  Not easy to work with, but I'm very happy with the end result! I was able to bling it out with Want2Scrap Swirl Rhinestones and add flowers too!

Now, keep an open mind, because I like to look at things quite differently and in my little world I enjoy lots of buttons, flowers, ribbon, bling, and lace, and I think if the world was made with those things, it would be such a lovely place.


My Totally Shabby Rose Garden Birdhouse is more for decoration purposes and it looks lovely in my craft room!!! I couldn't imagine a bird hanging out in my shabby birdhouse, but you know what I'm sure any bird with a sense of taste would love to hangout here!

MATERIALS USED FOR THIS PROJECT:

Other Products Used:
  • Want2Scrap - Pearl Swirl Rhinestones
  • Hot Pink Grosgain Ribbon
  • AdTech Hot Glue Gun
  • Shabby Chic Rose Trim - Walmart ($3.97/yd)
  • Offray Ribbon Trim 
  • Needle/Thread
  • Flower
  • Carte Bella - Paris Girl Collection
  • Acrylic Paint
  • Gesso
  • Measuring Tape
  • Mod Podge
  • Xacto Knife
  • Tim Holtz Distress Ink
I started out by applying Gesso to the birdhouse, because it was not a smooth finish, and my thought was to paint the birdhouse.  Well, I'm glad I didn't continue with that idea!  

I then measured the birdhouse to see how much paper I needed to cut my paper.  I determined where I needed to cut the circle for both the entrance of the birdhouse and the bird stand.  Now that was not easy what's so ever, but you will need a 1" circle punch.  I actually hand cut the circles with a xacto knife, because I didn't have a circle punch big enough to punch the circles out.

Once, I had all this figured out I then distressed my paper with Tim Holtz Vintage Photo Ink.  I then applied the Mod Podge to both the birdhouse and my paper that I cut and adhered the paper.

I wasn't sure if I was going to be able to apply buttons directly to the roof of the birdhouse because of the odd shape, but I tried and it was just not working for me.  With a needle and thread I sewed the Rose Garden buttons to the tip of my trim and glued the trim to the edge of my birdhouse.  I was still in the limbo with the roof of the birdhouse so, I decided to take a trip to my local Walmart and picked up this Ivory white shabby rose trim and with the AdTech Glue Gun I started to apply that to the roof.

I glued the Rose Garden buttons to the shabby rose trim and a ribbon to the top.  The rope that was attached to the birdhouse was not attractive so I disguised it with grosgain ribbon!

The rest of my birdhouse I decorated using Want2Scrap bling, flowers that I picked up at a local shop.  When you live in a small town as this one, you don't have a lot of craft stores to select from; in fact all we have is a Walmart, Kmart, and Quilting Store, which is where I go the most to pickup things that may help with my projects.  The nearest craft store is about 3 hrs away, so I have to work with what I have.

I hope you enjoyed my Totally Shabby Rose Garden Birdhouse, be sure to checkout Buttons Galore & More website and choose your favorite Birdhouse for a chance to win a $10 Starbuck Gift Card!

ALSO here are the blogs of the other Designers who are participating in this Buttons & Birdhouse Challenge, be sure to stop by there and leave a comment as well.

  1. You are here:  www.creandocondetalles.blogspot.com  NEXT GO TO:
  2. Buttons Galore & More:   http://wp.me/p2hPby-1No  (DON"T FORGET TO SELECT YOUR FAVORITE BIRDHOUSE!)
  3. Allie Gower:  http://www.MyCardParty.com
  4. Holly Gagnon: http://www.ribbonsandglue.com/
  5. Angie Holden:  http://www.ribbonsandglue.com/
  6. Melony Bradley:  http://www.ribbonsandglue.com/
  7. Laura Kelly: http://www.laurakellydesigns.com/laurakellydesignsblog/
  8. Jen Goode:  http://www.jgoodedesigns.com/
  9. Tracey McLennon:  http://scrappychick101.blogspot.ca/\
  10. Laura Bray:  
  11. Carla Schauer:  http://carlaschauer.com/


Tuesday, March 19, 2013

Pretty Girl Baby Onesie

So, I wanted to make something a bit different with my Baby Onesies, and of course, I couldn't finish my project without using some of my all time favorite products.  For this card I couldn't help but to use Buttons Galore & More Pretty Girl Brads.  The brads were just perfect for this project!

Now if you look at this Pretty Girl Onesie it has a tutu that I made out of toule and trim.  I love how this card turned out.


Let's talk about some of the things I used to create this Pretty Girl  Onesie card.  

Materials Used to Create this Pretty Girl Onesie Card:
To create this card just follow my tutorial that can be found via Want2Scrap's blog at http://want2scrap.com/blog/ or their ustream channel http://www.ustream.tv/new/search?q=want2scrap.
The technique is the same just play around with the toule and I found that the best way is to do a running stitch and adhere to the card.  Once you have it glued to the card just hot glue the trim to cover up the running stitch at the top of the toule.  for the Pretty Girl brad I snipped the back of the brad in order to adhere it to the card, it just made it better than trying to punch a hole to the card.  Once I snipped the back of the brad I adhered to the card using hot glue.  

Now you know no card is fairly complete unless I add bling so to top this card I used Want2Scrap Maxxi Girl Pearl Swirl and one of their newest products which is the crown charm that you see at the top of the sleeve.

I hope you enjoyed this take on my baby girl onesie wearing a tutu!  Be sure to check out Buttons Galore & More and Want2Scrap!